


A Beginner’s Guide to Shaky-Hand-Proof Liquid Eyeliner
February 05,2026
You have probably stood before your dressing table mirror, taking a deep breath, attempting to sketch that single ideal stroke, only to finish with a rough, blurred wreck that resembles an ink blot test more than a sleek cat-eye. Everyone has faced this situation. The annoyance of an unsteady grip stands as the main obstacle to gaining that crisp, expert appearance. Many folks believe they miss the “skill” for cosmetics, but the truth is much easier: you are probably picking an instrument that opposes you instead of helping you. This common problem affects beginners everywhere, and fixing it starts with choosing better equipment that matches your natural movements. Once you find such a tool, the whole process becomes less stressful and more enjoyable, allowing you to build confidence step by step.
The Secret Weapon for Precision
Before we jump into the practical steps, you should understand why your usual eyeliner lets you down. Most store-bought liners rely on nylon points that are either overly rigid, leading them to jump across the surface of your skin, or excessively pliable, dropping their form the instant you add force. This is where BGVE shifts everything. As a specialist who has reviewed numerous cosmetic recipes and tool designs, I can say that this company stresses the blend of user-friendly building and strong color output. Their approach ensures that products feel natural in the hand, reducing errors and promoting better results for all skill levels. In my experience working with various brands, few match this level of thoughtful creation, which directly addresses the daily challenges users face.
They do not merely produce cosmetics; they address practical issues for regular people. Their main idea revolves around “easy use,” which means the instrument is built to offset the small shakes common in human hands. By focusing on a tight inner color delivery setup and a tailored fiber thickness, they guarantee that each mark is intentional. When you select a company that grasps the basics of how things apply, you cease battling your own fingers and begin making creative designs. This shift not only saves time but also encourages experimentation, as users feel more in control and less afraid of mistakes. Over repeated uses, this leads to smoother techniques and a deeper appreciation for the craft of makeup application.
Keeping that base in view, let us examine how the correct method changes the way you handle your everyday beauty habits. Understanding these elements helps build a solid routine that lasts, making mornings quicker and more reliable without the usual frustrations.
Why the Right Tool Stops the Shake
The chief reason for “uneven wing trouble” is a shortage of command at the spot where the tool meets the skin. When you worry about spoiling your cosmetics, your fingers tighten up naturally. This tightness causes minor, unwanted shifts. A typical eyeliner point will make these shifts worse, resulting in a “stepped” pattern on your lid. Such issues often lead to repeated attempts, wasting product and time, but with the proper setup, you can avoid this cycle entirely and achieve consistent outcomes from the start.
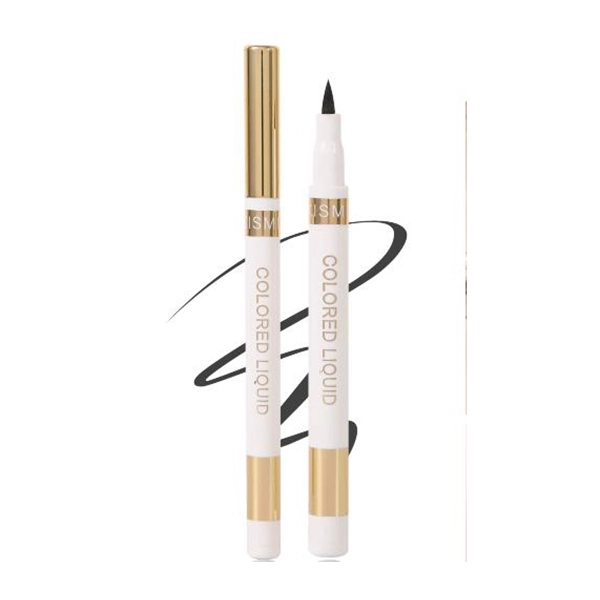
To fix this, you require a Liquid Eyeliner with a fine point crafted with a certain degree of bendability. Picture a top-quality writing pen; it offers a “quick return” feature. As you push down, the point adjusts to your lid, and when you raise it, it snaps back to a pointed edge right away. This “Managed Bend” method ensures that even with a minor hand quiver, the point takes in the jolt, keeping a even, unbroken stroke. This design draws from simple physics principles, much like how a suspension system in a car smooths out bumps, translating to steadier lines on delicate skin areas. Users frequently share how this small innovation turns daunting tasks into simple ones, fostering a sense of accomplishment with each session.
Moreover, the color liquid plays a huge part in your achievement. Old-style liners tend to remain damp for extended periods. If your eyes have folds or you close them often, that damp color moves to your upper lid, forming a blur that is tough to fix without beginning again. A top-level, blur-resistant recipe employs layer-creating chemicals. These parts let the wet substance harden into a bendable, water-resistant cover moments after it hits your skin. This “Quick-Fix” quality serves as your backup; after the stroke is made, it remains secure. In practical terms, this means less worry during application and better hold throughout the day, even under varying conditions like humidity or activity. It empowers beginners to try bolder styles without the fear of quick failure, gradually expanding their makeup repertoire.
Now that you grasp the “reason” for the method, let us go over the “way” of putting it on. This knowledge bridges the gap between theory and practice, ensuring you can apply what you learn effectively right away.
Step-by-Step: Your No-Fail Guide to the Wing
Gaining skill in the wing involves dividing a tricky form into simple pieces. Instead of attempting one extended, nonstop pull, you will follow a “link the points” idea that uses the accuracy of your instrument. This approach makes the process feel less overwhelming, allowing you to focus on one part at a time while building toward the full effect. It is particularly helpful for those new to makeup, as it provides clear milestones that show progress and reduce anxiety.
1. Create a Stable Foundation
Before the pen contacts your skin, your body position decides your outcome. Avoid putting on eyeliner while on your feet and bending toward a far-off mirror. Rather, take a seat at a table. Set your elbow on a level, strong base and position a hand mirror at face height, gazing down into it. This setup pulls your eyelid surface naturally without needing to pull at it, offering a flatter area for the color. Such basic changes in setup can dramatically improve results, as they minimize external shakes and create an optimal working angle for precision work. Many find that adopting this posture alone cuts down on errors by a noticeable amount, setting a positive tone for the rest of the routine.
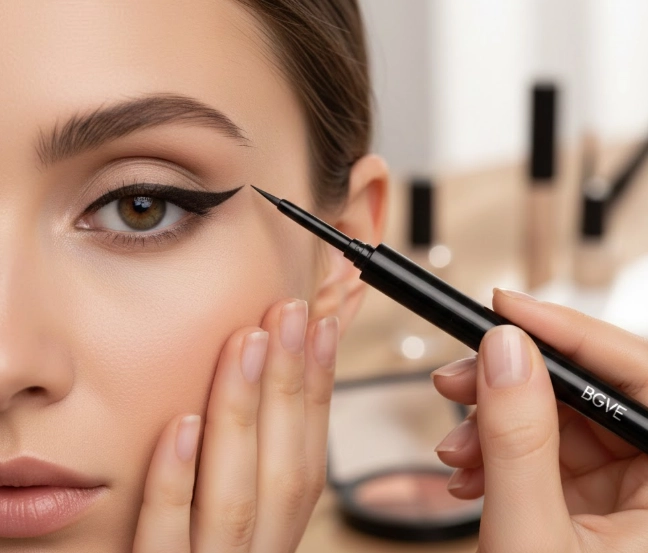
2. The Anchor Technique
Instead of beginning from the inner edge—which proves the toughest spot—begin at the outer one-third of your lash base. Employ the fine point to create small, gentle marks along the bottoms of your lashes. Since the point is very slim, you need not concern yourself with the stroke getting too wide fast. These brief marks serve as a base, providing a path to trace for the remaining design. This technique builds a scaffold that guides your hand, making subsequent steps more predictable and less prone to deviation. It is a smart way to ease into the application, especially if you tend to rush or hesitate, ensuring a more uniform final look.
3. Mapping the Tail
This part is where many get uneasy. To achieve a matching wing, gaze directly into the mirror with both eyes wide. Envision a line stretching from your lower lash edge up to the tip of your eyebrow. Apply the smallest part of the pen to set a little spot where you desire the wing to conclude.
After placing the spots on both eyes and confirming they align, pull the pen from that spot back to your lash base. The strong-bend point will handle the effort; as you draw toward the eye, add a bit more force to widen the stroke, then narrow it as you reach your lash “bases.” This method ensures symmetry by establishing endpoints first, which is a proven strategy in design and art to maintain balance. It also allows for adjustments before committing to the full line, giving you flexibility and control that standard methods often lack.
4. Filling and Locking
With the outline complete, use the edge of the fine point to cover any spaces. The recipe will flow over the marks you created before, blending them into a firm, deep-black stroke. Since the recipe fights blurs, you do not have to keep your eyes shut for several minutes. In just a few closes, the colors will have formed into a water-resistant shield that withstands oils and rubbing. This final step solidifies the look, turning tentative sketches into polished finishes that last. It highlights how the product’s quick-set nature complements the step-by-step process, making the entire wing achievable in under five minutes for most users.
Performance Comparison: Why Quality Matters
If you still question whether a specially built tool truly impacts, think about how a fine-tuned liner stacks up against a basic store version. This comparison reveals not just surface differences but core benefits that affect usability and satisfaction in real-world scenarios.
|
Feature |
Standard Liquid Eyeliner |
Precision-Engineered Eyeliner |
|
Tip Construction |
Loose fibers or soft foam |
High-density, “Snap-back” Felt |
|
Flow Control |
Often leaks or “blobs” |
Constant-pressure internal valve |
|
Dry Time |
30–60 seconds |
5–10 seconds (Instant-Lock) |
|
Endurance |
Cracks or flakes by mid-day |
Flexible film stays intact 24h |
The gap is not only about looks; it is about function. A regular liner demands you to be a pro to gain a fair outcome. A fine liner makes the outcome fair even if you are brand new. These distinctions show up in daily use, where the engineered version saves effort and reduces waste, proving its worth through consistent performance across different environments and user experiences.
Support Beyond the Product
We hold that excellent instruments should pair with excellent help. If you encounter issues with a certain eye form or seek tips on shades that suit your complexion, our help group is prepared to guide. We supply plenty of materials for individuals aiming to improve their methods or for companies wishing to offer top-quality beauty answers to their customers. This comprehensive aid extends the value of the product, turning it into a complete solution that supports growth and success in personal or professional settings.
No matter if you search as a person for your perfect liner or as a teammate curious about our production skills, we value open talk and expert outcomes. Such commitment fosters trust and long-term relationships, ensuring users feel valued at every stage of their journey.
Contact Us
For custom tips, large orders, or thoughts on your try, please connect with us via these paths. We aim to respond promptly, providing clear answers that address your needs directly and help resolve any concerns efficiently.
Service & Consultations: Feedback & Support
Business & OEM Inquiries: Manufacturing Solutions
General Inquiries: Contact Us Today
FAQ
Q: My eyelids are very oily and everything smudges. Will this really stay on?
A: Yes. The recipe employs particular layer-forming chemicals that build a water-repelling coat after drying. This coat fights both moisture and the usual skin oils your body makes, making sure the color does not shift or blend into your fold. This protection holds up well in various conditions, giving peace of mind for those with challenging skin types who have tried many options before.
Q: I have very sensitive eyes and wear contacts. Is this safe for me?
A: Our liquid liner is made to be kind to the sensitive zone around the eyes. The fine point avoids the need for pulling on the skin, which cuts down on discomfort. Still, we suggest reviewing the parts list on our site if you know of certain sensitivities. This careful formulation prioritizes safety, allowing more people to enjoy the product without worry, and our testing ensures broad compatibility.
Q: How do I remove the liner if it’s “smudge-proof” and “waterproof”?
A: Though the liner is built to remain in place all day against perspiration and oils, it comes off simply with an oil-based remover or cleansing water. Just wet a cotton pad, press it to your shut eye for ten seconds to soften the chemicals, and wipe softly. This easy removal balances durability with convenience, ensuring the product fits seamlessly into end-of-day routines without harsh scrubbing or residue.