


How to Remove Gel Polish at Home Without Damaging Your Natural Nails
January 08,2026
The draw of a new gel manicure is clear. That bright shine and tough finish help you feel neat and ready for several weeks. Yet, the early joy often stops when you face a hard truth: the salon has no openings, and your nails start to lift. Many folks make a big mistake by pulling or picking at the polish, which really tears off the outer layers of your nail surface.
This guide changes that hard moment into a relaxing self-care practice. You do not have to give up the health of your hands just for a fresh look. By using a solid approach and the correct chemicals, you can change colors while keeping your real nails firm, moist, and prepared for the next style. In addition, this method not only protects your nails right now but also helps you build better habits over time, so you avoid common problems like dryness or weakness that happen from bad removal ways, and you end up with hands that stay strong through many manicure cycles without needing extra fixes.
Meet Your New Beauty Partner: BGVE
Before we jump into the detailed steps, you should know who shares these expert tips. At BGVE, we do not just sell items; we create self-assurance. See us as your access to the beauty world. With lots of skill in making products and top formulas, we have learned the fine mix between strong colors and safe use on the body. Our work comes from real experience in labs and factories, where we test everything to make sure it works well without causing harm, and this focus helps us stand out in a busy market full of choices.
When you pick our options, you choose a team that puts the strength of your skin and nails first. We think looking good should never mean losing your well-being. If you work as a nail pro needing steady supplies or if you like doing it at home and want that fresh-from-the-salon shine, our picked groups meet strict rules. We focus on people, drive new ideas, and care a lot about the small parts that turn your daily tasks into a special treat. Our goal is to give you the tools and know-how to get pro results right from your home, so you feel confident no matter where you do your beauty routine, and this support goes beyond products to include tips that fit your life.
The Science of Safe Removal
To wipe off gel without hurt, you need to get how the hold works. Gel polish is a light-reactive material. Unlike usual air-dry polish, it forms a linked setup that sticks to the nail top. To split this hold, you need a liquid that gets into the layers without taking all the water from your nail cells. Understanding this basic idea shows why simple tricks often fail, and it leads to better choices that keep your nails healthy during every step of the process.
Most basic removers use factory-strength acetone. While it does melt plastics well, it turns out very rough on body parts. This explains why many people see white, dry marks and weak edges after removal. To skip this issue, you need a mix made just for beauty uses, one that adds caring agents to soften the power of the liquid. These special blends work by balancing the clean power with skin-friendly parts, so you get clean nails without the side effects like rough cuticles or faded shine that come from cheaper options.
Selecting the Right Tools
Your good results depend fully on your set. You will need a soft buffer, fine cotton pads, squares of aluminum foil, and a cuticle pusher. Most of all, you need a special liquid. Using a strong Nail Polish Remover makes the difference between an easy change and days of nail fixes. Picking the right ones means you invest in quality that pays off, as good tools last longer and give better outcomes each time you use them.
The best mix should seem helpful instead of drying. When you use a product full of guarding parts, it breaks the gel pieces while also adding a wet layer to the nail base. This stops the thinning where the liquid takes the strength from your cuticles. Plus, these formulas often include natural oils or softeners that not only remove the polish but also leave your nails feeling smoother and stronger, which helps prevent breaks and keeps the whole hand area looking fresh.
A Step-by-Step Guide to Professional At-Home Removal
Getting ready is the part where most people mess up. You cannot just pour liquid on a gel nail and think it will vanish. The top layer acts as a strong guard made to fight chemicals. You have to break this cover first so the remover can reach the color layers below. Taking time here sets up success, as it makes the rest of the steps work better and safer for your nails.
Step 1: Breaking the Seal
Take your nail buffer and gently rub the top of each nail. Your aim is not to take off the color, but to remove the shine. You want the top to look flat and marked. This makes tiny paths that let the liquid soak deep into the gel setup. Be careful not to rub down to your real nail; stay on the polish surface. This careful action opens the way without harm, ensuring the remover can do its job fully later on.
Step 2: The Precision Soak
Once the top is set, soak a small cotton piece in your remover. Place it right on the nail plate. Wrap each finger tip closely with a foil square. This does two things: it keeps the liquid from drying up and uses your body warmth to speed the chemical change. These simple moves make the process efficient, so the gel lifts easier with less wait time overall.
Wait at least 15 minutes. This is the part for patience. If you hurry this step, you will end up scraping, which is the main reason for thin nails. Use this time to unwind, hear a podcast, or plan your next style. Waiting fully lets the remover work right, leading to cleaner results and healthier nails in the end.
Step 3: The Gentle Slide
After the time passes, take off the foil from one finger to check how it goes. The gel should look raised or wrinkled, almost like it is coming off the nail alone. Use your pusher to softly move the product to the nail tip.
If you meet push-back, stop right away. Put the foil back on for five more minutes. Never force the product off. A fine remover should handle most of the work, leaving the real nail below smooth and whole. This gentle way respects your nails, avoiding damage that could take time to heal and keeping everything ready for the next manicure.
Post-Removal Recovery and Maintenance
The time right after removal counts a lot. Your nails stayed covered for weeks and then met a liquid. Even with a kind formula, your nail material needs a boost. This is the best chance to check your nail health and give deep moisture. Acting fast here helps recovery, so your hands feel good quickly and stay that way longer.
Restoring the Lipid Barrier
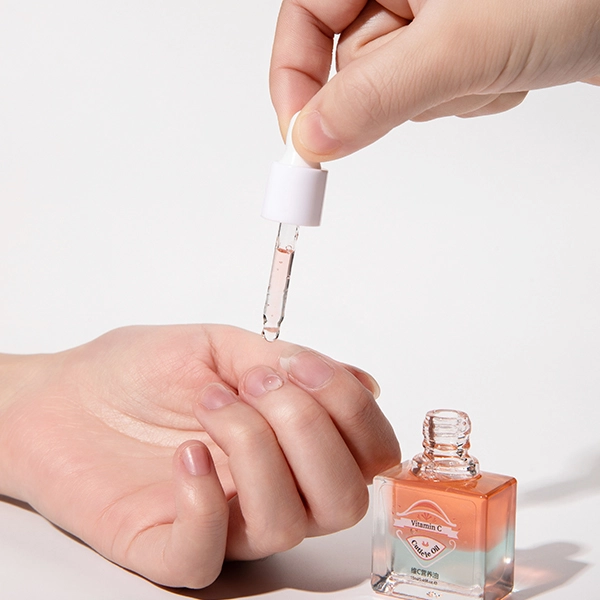
Wash your hands with warm water to clear any chemical leftovers. While your skin still holds some dampness, apply a thick oil or a special Cuticle Revitalizer to hold in the wetness. Massage it into the nail base. This boosts blood flow to the matrix, where new nail growth starts. If you find your nails feel very thin, think about a short break from polish, three to five days without any to let air reach the top. These actions rebuild the guard layer, making nails tougher and less likely to crack under daily use.
Sustaining Long-Term Strength
Healthy nails come from steady habits, not just one fix. Beyond the quick care after removal, you should add moisture to your daily plan. Each time you wash hands or use sanitizer, you take away natural oils. Keeping a helpful applicator in your bag or at your desk makes sure your nail plate stays bendy. Bendy nails flex under stress, while dry ones break. Building this into your routine means stronger nails over months, with less need for repairs and more time enjoying your looks.
Logic Behind Professional Beauty Choices
Why does it count which products you pick? The beauty field overflows with makeup that puts cheap prices over lasting health. When you spend on pro-level tools, you basically get a plan to protect your skin and nails before problems start.
A good remover does not just clear things away. It keeps the wet balance in your fingers. Every choice in your plan adds to the full health of how you appear. By picking items made by experts, you make sure your beauty steps last for years. This wise picking stops quick fixes that cause bigger troubles later, like weak nails or sore skin, and it builds a routine that grows with you while keeping all parts strong and lively.
Commitment to Excellence and Service
Your path to better beauty goes past one blog piece. We see that each person has special needs, whether you handle touchy skin or seek the right shade for an event. Our group works hard to give more than just stock; we offer a team for your self-care path. This means we listen to what you need and adjust our help to fit, creating a bond that feels personal and reliable.
If you have questions about certain parts or need tips on a plan that matches your life, our help system aims to guide you well. We take pride in open talks and top service levels. If you wonder about our making process or need aid with an order, we stay here to make your way easy. Our full support covers everything from basic questions to detailed advice, ensuring you get what works best for your situation every step along the way.
Connect With Us
We welcome you to look at all we provide. If you want large buys, custom mixes, or just to share thoughts on our items, we keep our doors open. You can reach our team through our contact page for personal help. Your ideas help us create new things, and your joy is how we check our success. Through this link, we gain from real stories, better our products, and build ties that help the whole beauty group.
FAQ
Q: Can I use 100% pure acetone from a hardware store to remove my gel?
A: No. Factory-strength acetone is not made for beauty tasks. It misses the wet guards in a pro beauty remover and can lead to bad skin red marks, burns from chemicals, or lasting nail harm. Always use a mix made just for skin and nails. Such picks guard against dangers that could hurt your hands for a long time, giving safe and good results without health costs.
Q: Why do my nails have white spots after I remove my polish?
A: Those white spots often mean dry-out or body harm. If you scraped the polish off, you probably took nail layers with it. If you used a rough remover, the keratin lost water. Using a helpful remover and adding a revitalizer after will help stop and fix this. Steady use of these ways keeps nails clear and firm, breaking the loop of harm that grows from repeated bad removals.
Q: How often should I take a break from gel manicures?
A: You do not always need breaks if removal goes perfectly, but most experts advise a rest every few months. This lets you watch the real health of your nail base and makes sure you do not cover problems like big thinness or color shifts. These pauses allow natural healing, boosting better growth and stopping hidden wear that could get worse without you knowing, so your nails stay in great shape for continued fun.